SoftEther VPN
Windows Server 2019

Table of contents:
- How to start the VPN Server admin panel
- How to work with VPN
- How to customize VPN client
- How to start OpenVPN
- How to connect to VPN
SoftEther VPN Server Free VPN for Windows 2019
First you need to open UDP port 1194 in the properties of the Azure Firewall network.
To start the VPN Server admin panel, you should open the app “SoftEther VPN Server Manager” on the desktop. Click “Connect” in the opened window of the app:

When you first enter the application, enter the password “softpassword” into the authorization window.
To work with VPN, at first you should add a user in the app.
For this you need:
- Click on the “Manage Virtual Hub” button:
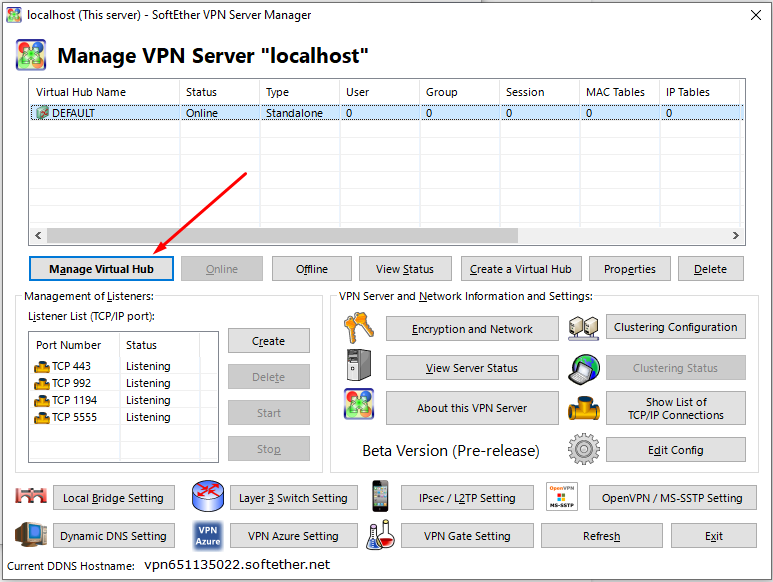
- Then click on the “Manage Users” button:

- To create a new user, click “New”:

- It’s necessary to insert the name of the user into the “User Name” field, type the password into the “Password” field and verify it by re-entering the password into the “Confirm Password” field.

- After the data were entered, click “OK”.
The instruction for the customization of the VPN Client
To customize the VPN Client, first you need to know the server IP address. You can find it in the personal account of Azure. (You need to select the virtual machine from the list. By clicking the item “Overview”, your IP is displayed in the line of “Public IP Address”).
After that, you need the OpenVPN Client for the work. Go to site: https://openvpn.net/community-downloads/ and download the installer in the “.exe” format, depending on your OS Windows:

After the downloading of the installer is finished, you should run it.
In the opened window of the OpenVPN installer click on the “Next” button:

After that click “I Agree”:

Click “Next”:

Then click “Install”:

After the installation progress is finished, click “Next”:

And then click “Finish”.
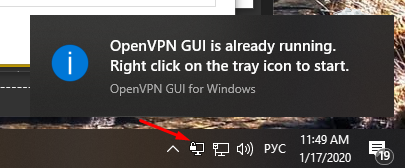
When you try to start OpenVPN after the installation, the pop-up message of the absence of the configuration files appears:

In order for OpenVPN to work, you need to add these configuration files for the app by hand. You can create them in the “SoftEther VPN Server Manager” app. For this you need:
- Run the “SoftEther VPN Server Manager”.
- Click “Connect” in the opened window of the app.
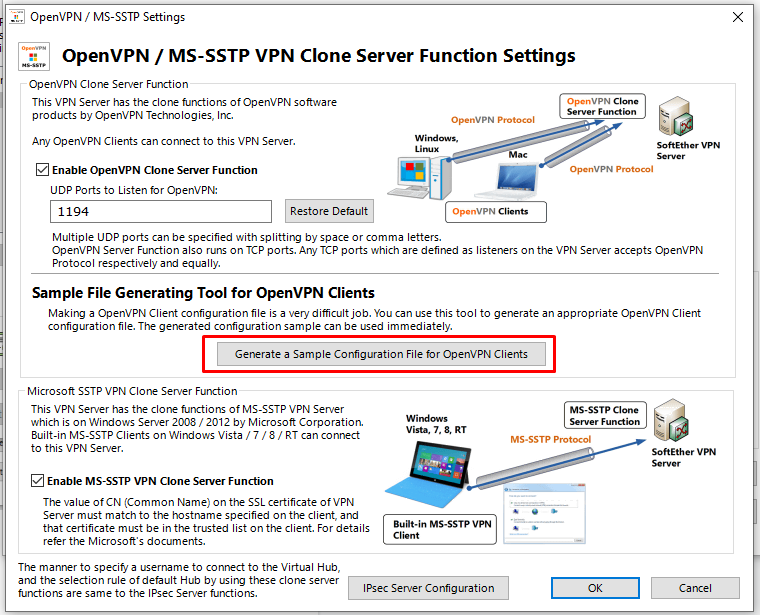
- Click on the “OpenVPN / MS-SSTP Settings” button.

- Click on the “Generate a Sample Configuration File for OpenVPN Clients” button.
- When the window of the Windows Explorer is opened, select the path to save the archive:

- There are the next files in the saved archive:

- You should transmit the file named “…_openvpn_remote_access_l3” by the path of installation of the “OpenVPN”, in this case (since the standard path was selected) this is “C:\Program Files\OpenVPN\config”.

Now the OpenVPN is ready for work and you can run it. After it was started, the app is displayed in the system tray in the form of the monitor icon with the lock.
To connect to VPN you should click the icon with the monitor with the lock twice.
The next windows will be opened:

In the fields “Username” and “Password” it’s necessary to enter the name and the password which were added to the “SoftEther VPN Server Manager” and after that click “OK” to connect to the VPN server.
Now your external IP address has changed and you are using the Internet through the VPN server of the virtual machine.
