Configuration and launching SUSE Enterprise 15 with Rocket.Chat
Before creating a VM, review the system requirements for the Rocket.Chat server: Hardware Requirements – Rocket.Chat Docs
- Start VM through Azure Portal. The Rocket.Chat service is run automatically when the VM starts.
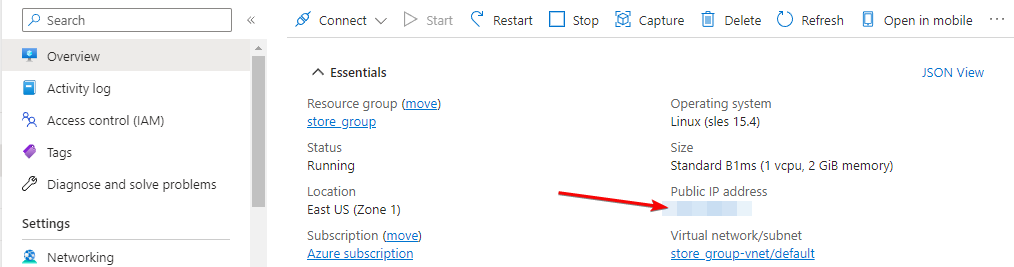
- For the connection to the server, you should know the IP address of the VM. You can find it in the personal account of Azure. (You need to select the virtual machine from the list. By clicking the item “Overview”, your IP is displayed in the line “Public IP Address”).
- To work, you must open port 3000 (TCP) in the network properties in the Azure firewall.

- For the initial server configuration, go to the following address http://*vm_ip:3000 with any browser.
- In the first step, you need to fill in the data for the administrator account – your name (1), username (2), email (3), and password (4). Then click “Next” (5)

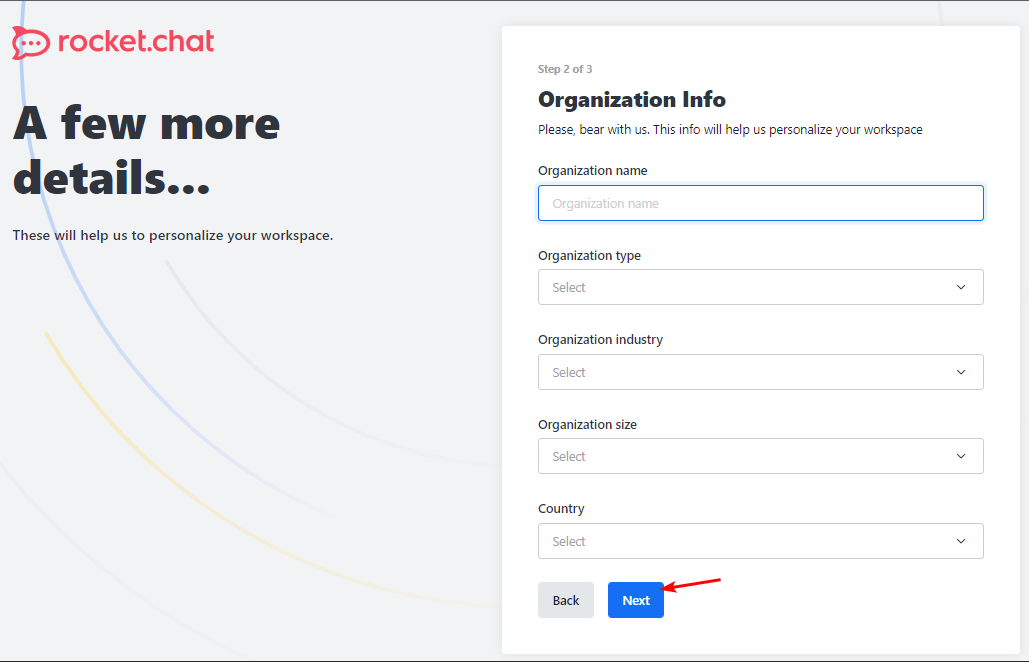
- In the second step, you must enter information about the organization where Rocket.Chat will be used. Filling data fields can be skipped and then press “Next”.
- In the third step, confirm your agreement to the Terms, Conditions and Privacy Policy (1). This item can also be left unchanged and press “Register” (2).

- Confirm changing IP.

- You have been sent an email confirming your registration.

- Go to your mail client and confirm registration.

- You have been redirected to the next page.

- Return to your Rocket.Chat page – it’s ready.

- Server setup is complete. You can invite new members using link.

- You can use it through the application client that will be most convenient for you (you can find a list of them on the Rocket.Chat website) or the web version.

Connect to a VM using SSH:
- To manage with a server, you should connect to a VM.
- With OpenSSH
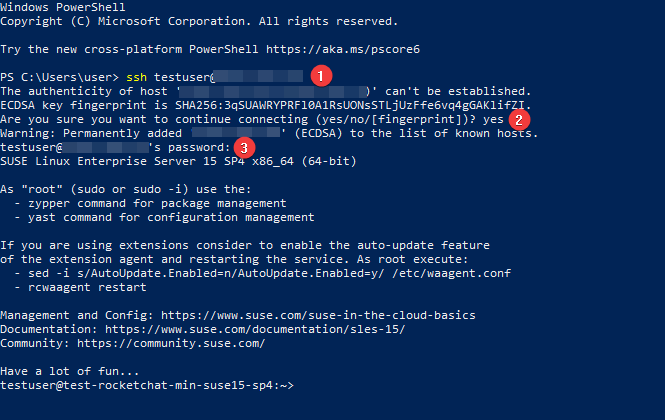
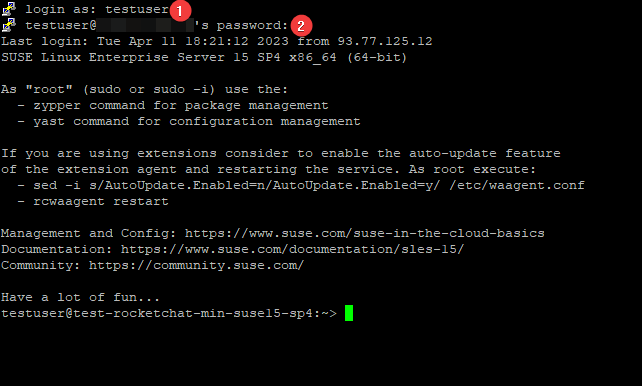
In the Windows 10 operating system (starting with version 1809), an OpenSSH client is available, with which you can connect to Linux servers via SSH. If Windows 10 is suitable and the OpenSSH client is installed, you can start connecting via SSH. To do this, launch a normal Windows command prompt and enter the command “ssh user@*vm_ip*” (1), where “user” is the username that was specified while creating the virtual machine and “*vm_ip*” is the VM IP address.
Then type “Yes” (2) and enter a password (3) that was specified while creating the virtual machine.
- With the PuTTY application
To do this, you need the PuTTY application to connect via ssh. You can download it at the following link – Download
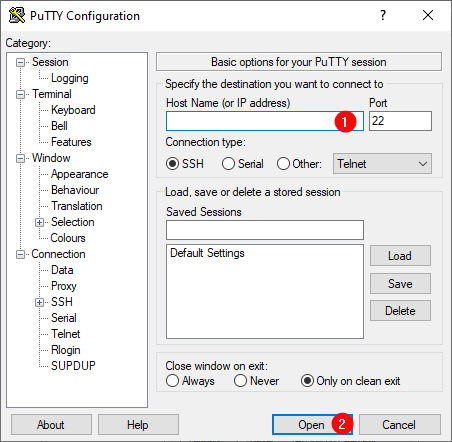
Run PuTTY, enter the VM address in the “Host” field (1), and click “Open” (2) to connect.
In the opened console, you will need to enter a username (1) and password (2) that were specified while the VM was being created (you’ll not see the password in the console while entering it).
- Enter next commands:
sudo service snap.rocketchat-server.rocketchat-server status – checking server service status

sudo service snap.rocketchat-server.rocketchat-server restart – server service restart
Official instructions for configuring and working with Rocket.Chat:
