UBUNTU 20.04

The guide on how to use Ubuntu 20.04 with Minecraft Bedrock Game Server
- To start the server, you just need to start the VM through Azure Portal.
- For the connection to the server, you should know the IP address of the VM. You can find it in the personal account of Azure. (You need to select the virtual machine from the list. By clicking the item “Overview”, your IP is displayed in the line “Public IP Address”).

- Run your client to play the Minecraft Bedrock Edition.
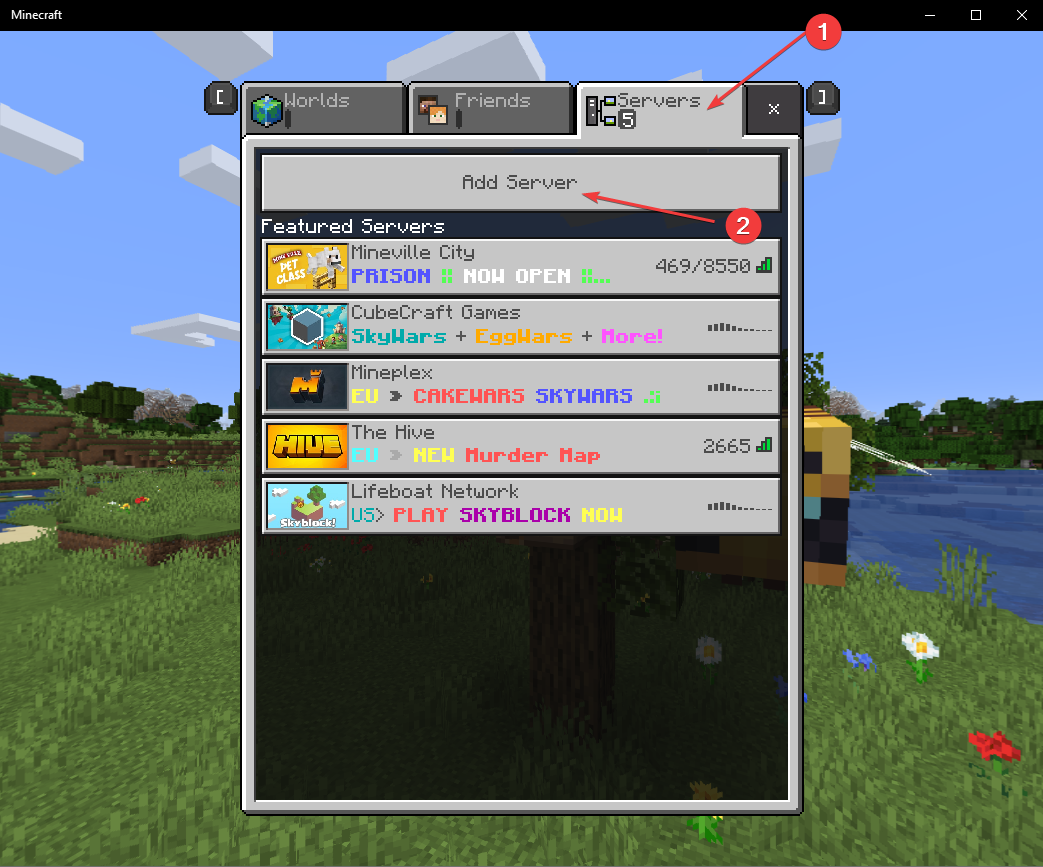
- Click “Play” in the main menu.
- Go to the “Servers” tab and click “Add Server”.
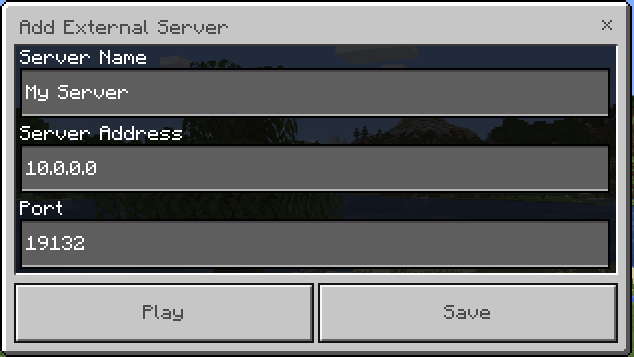
- In the window, in the “Server Name” field name the server as you like.
- In the “Server Address” field enter the IP address of the VM and click “Play”. The “Port” field leaves with no changes.
Server settings management
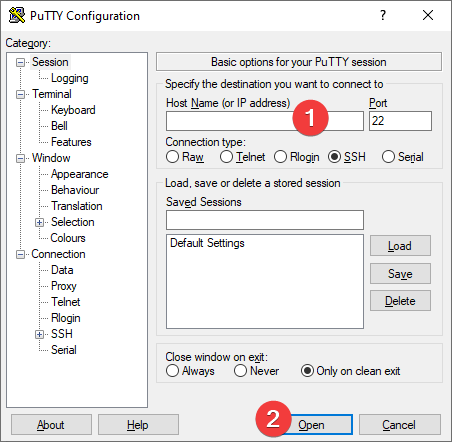
- Download and run Putty, then in the “Host Name” field, enter the address of the VM. Then click “Open” to connect.
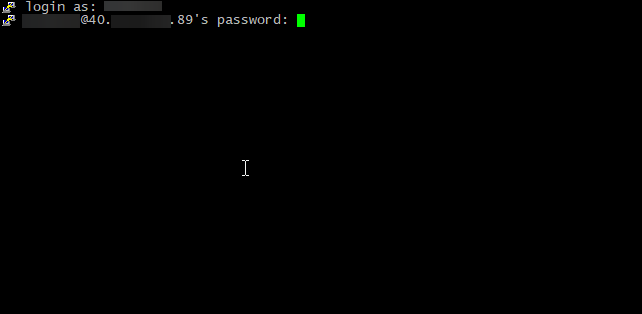
- In the opened console you will need to enter the login and password specified while creating the VM.
- To manage the server, you can use the commands described in the basic usage tab following the link – https://linuxgsm.com/lgsm/mcbserver/
- In order to enter these commands, you must enter sudo su into the VM console.
- Next enter su steamuser then change the directory cd /home/steamuser.
- Now you can enter special commands to control the server. By entering e.g. ./mcserver details, you can find out the state of the server.
