Configuration and Connection to Ubuntu 22.04 Minimal with Jitsi
Creating DNS name through Azure Portal
- The first step is to create a DNS name that will be used for further connection.
Alternatively, if you have already purchased an SSL certificate for your DNS name, you can skip this step. In this case, we recommend that you read the following documentation:
- To create a DNS name through Azure Portal, go to the VM settings in the “Overview” section.
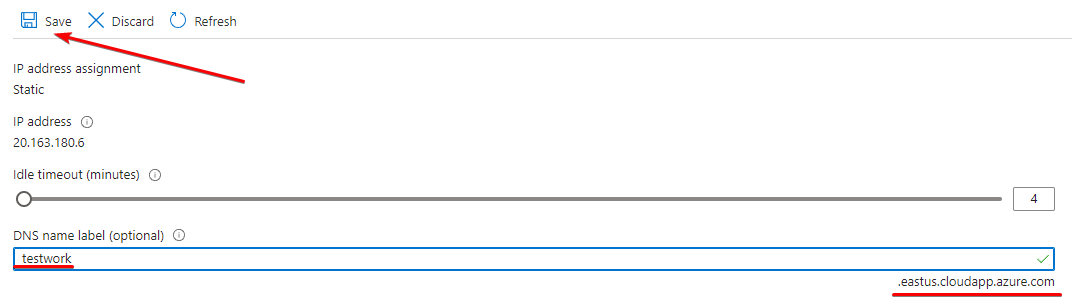
- Go to “DNS name” settings.

- Fill in the “DNS name label” field and click “Save” at the top.
- To work, you should open the following TCP: 22, 80, 443, 4443, 4444, 8443, 10000, and UDP: 10000 ports in Azure Firewall.

Connection to Jitsi:
- After you finish creating the server, you can go to https://*dns_name* (be sure to specify HTTPS)

- If you get an error when connecting by DNS_NAME, please enter https://IP_your_VM:8443 in the address bar

- You may have to click the “Advanced” button to open the Jitsi page and then the link at the bottom.

- Now you can create and connect to the rooms. To do this, enter a name in the “Start a new meeting” field and press “Start meeting”. The list of available rooms is displayed below, just click LMB on it to connect.

Congratulations, you can make video conferences with your colleagues and friends.
